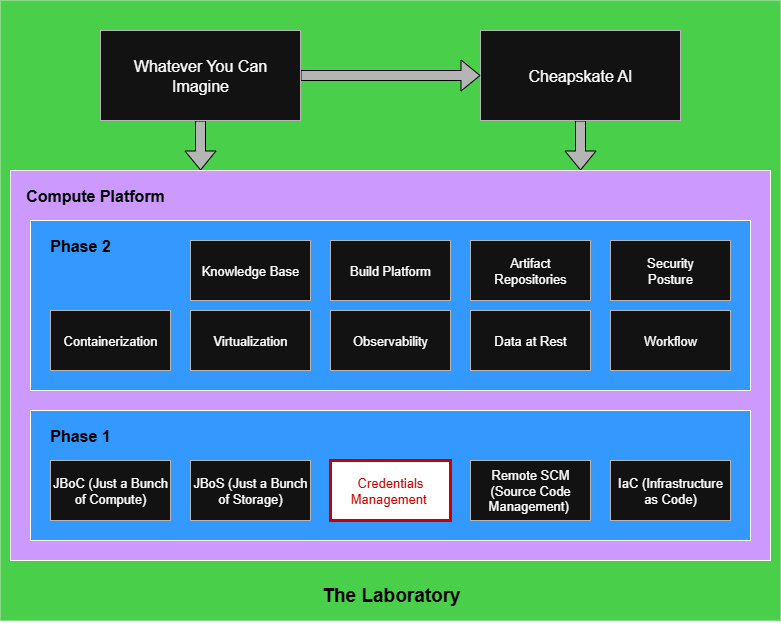
Phase 1: Credentials Management and Bootstrapping
Bootstrapping a little security into the new experimental platform
When you first start setting up the compute nodes you may have no meaningful infrastructure in place. There are steps to the sequence of bootstrapping from nothing and ending up with the nodes in a consistent state. You won’t be able to use PXE to do network-based installations. You also won’t have anything like an LDAP server to integrate via PAM to handle server authentication and authorization. Down the road maybe, but on day one, no.
Prev: Phase 1: Just a Bunch of Storage
When you begin the process you’ll have placed a bootable ISO image on a USB drive for the operating system you’ve chosen. I would recommend preparing a second USB drive with any firmware updates your particular compute node hardware model may be due. Update the firmware first, and then install the O/S via the ISO image. If you want to be extra careful, make sure you have a copy of the existing firmware version before performing the update, in case you have to revert to your starting point.
Make life easier on yourself and put some visible external labels on those USB sticks. If you have multiple compute nodes to set up, you’ll be following the same process over and over. Start taking notes as you go through the setup the first time.
As the installer runs you’ll be asked a number of questions. Some will relate to disk partitioning, for which the previous article will give you guidance. A few will relate to specifying a non-root user, to complement the root user which is always installed. Once the installation completes, you have the starting point from which you need to bootstrap a little security.
The initial security work won’t be all you’ll ever want to do, not by a long shot, but you need a baseline that will support routine remote access and running Infrastructure as Code (IaC) jobs that will progressively establish the full functionality of your platform. The first pass is only what you can’t or shouldn’t avoid. It is not enough to consider the environment as being secure. You’re establishing connectivity, and as part of that connectivity you will need credentials to support authentication.
Managing Credentials
Credentials like SSH keys, TLS certificates, and GPG keys become your first intellectual property assets that you don’t want to lose. The point of them is that you should be unable to perform operations or connect to systems that use those credentials to control access or certify identity. The more secure your platform, the harder it would be to recover functionality if those credentials were lost.
Preserving credentials is one area of functionality for which you should consider using a remote service vendor. Any passwords, keys, and certificates should be immediately preserved in the remote service. Assuming you are doing your cluster work as a solo experimenter, you won’t need to care about establishing any kind of-group permission structure, which will make things easier.
Credential automation is much tougher, and for “Phase 1” you probably need to be realistic about how much of that you can pull off. As an example I only know of one remote credential manager that has substantial Linux Pluggable Authentication Module (PAM) support — Keeper Security — and largely that is to use their Privileged Access Management product. Yes, I know, two entirely different uses of the acronym PAM, as if computer security wasn’t a strange enough world. I haven’t worked with Keeper myself, but from what I can tell the functionality somewhat overlaps on LDAP.
The Bootstrapping
My initial “good enough for now” bootstrapping is to use Bash scripts that I run on each compute node after the O/S install finishes. The complete process looks like:
Attach a monitor and keyboard to the uninitialized box.
Install the firmware USB, boot the box, then install any firmware.
Install the ISO image USB, boot the box again, then install the O/S (which will request the password for the non-root user it creates).
On whatever host you use for other work, such as your laptop, create an SSH key pair that will be used for authenticating as that user. Since “you” are “you” all the time, you use the same key pair for all the compute nodes. NOTE AGAIN, this is not a final security posture for the cluster, we’re just bootstrapping.
Save both halves of the SSH key to the remote vendor service you selected for preserving credentials, so you don’t lose them.
Configure your network router to recognize the MAC address for the new box and assign a static IP. You aren’t running a big company, I wouldn’t sweat DHCP for the experimentation platform until you find you need it, particularly since ssh would complain on every change to an IP address.
Using your working (e.g. laptop) host, connect remotely to the compute node via that static IP to supply the user and password. These are the non-root credentials you specified when the O/S was installing.
Copy-paste the bootstrapping Bash script that configures the user account.
Run the script. You should have designed it to ask you for the public half of the SSH key pair you created, which it will install in ~/.ssh and update ~/.ssh/authorized_keys to know about the new key.
If you have root-level changes to make (e.g. to configure sshd and sudo), copy-paste the Bash script for that.
Run the second script via sudo.
Don’t logout yet, but start a second terminal session and verify that you can login. If not, you have a mistake somewhere and you want to get that fixed before you lose viable access (else you may have to install the node from scratch).
As a final step I would recommend completely power-cycling the node. If you’re going to have any problems, you may as well find out now.
There are assorted refinements you can make to the instructions above, like:
Remove password access to an account once the public SSH key is in place.
Have separate accounts for human-user access versus automation-user access (a need that will become clearer in a future article).
Ensure the ~/.ssh directory and file permissions meet the requirements that sshd will enforce.
Inform the compute node of its intended host name, as it probably won’t pick that up from the router.
Make the script behaviors idempotent so that re-running them isn’t harmful. Until you’ve going through the process a couple of times you’ll keep adding tweaks as you figure out exactly what bootstrap steps you need.
The options are only constrained by your Bash skills. Later on we’ll be doing proper IaC automation, so the primary purpose of any bootstrapping is to get us just to that stage.
Script Samples
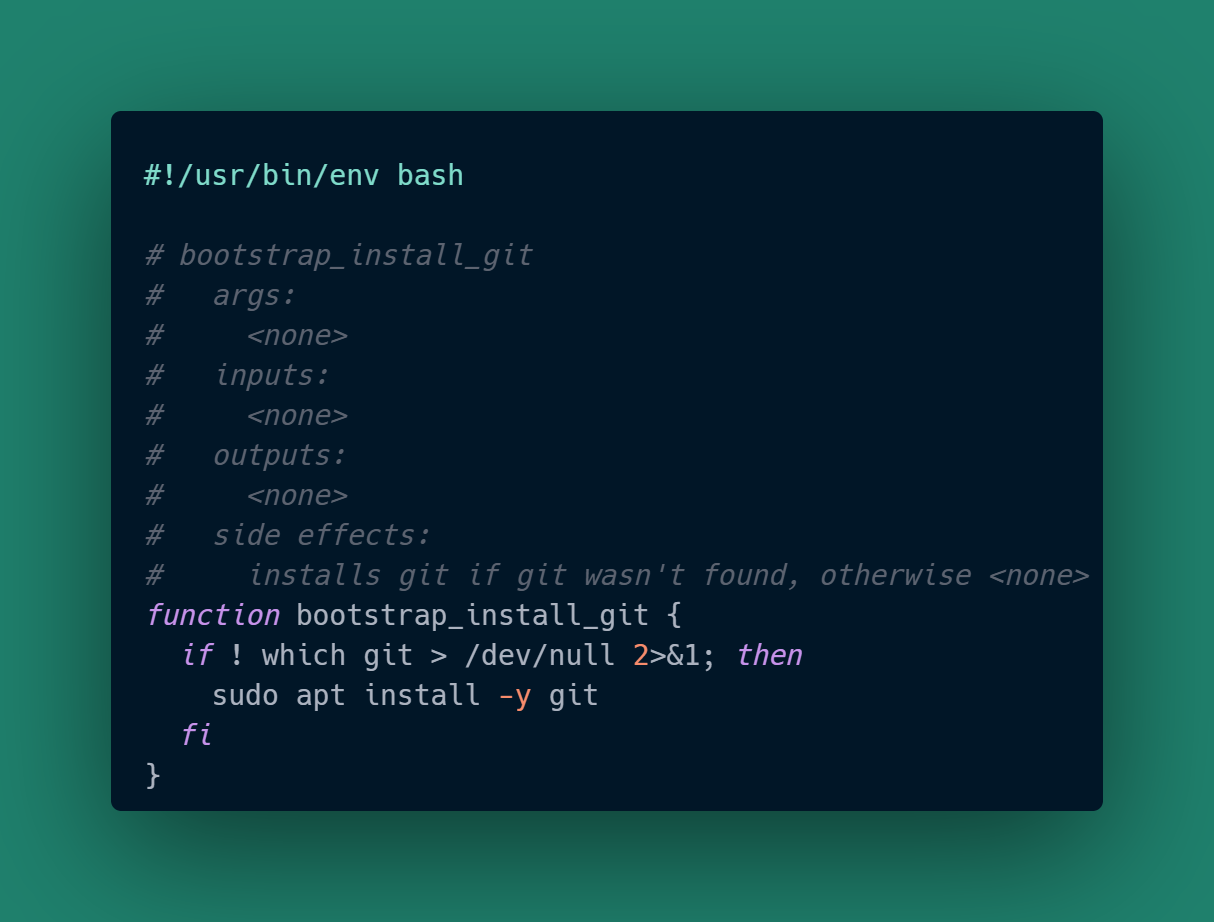
My own bootstrapping is split into files for particular features, which currently are all for Ubuntu 22.04. Here is an example for ensuring git is installed:
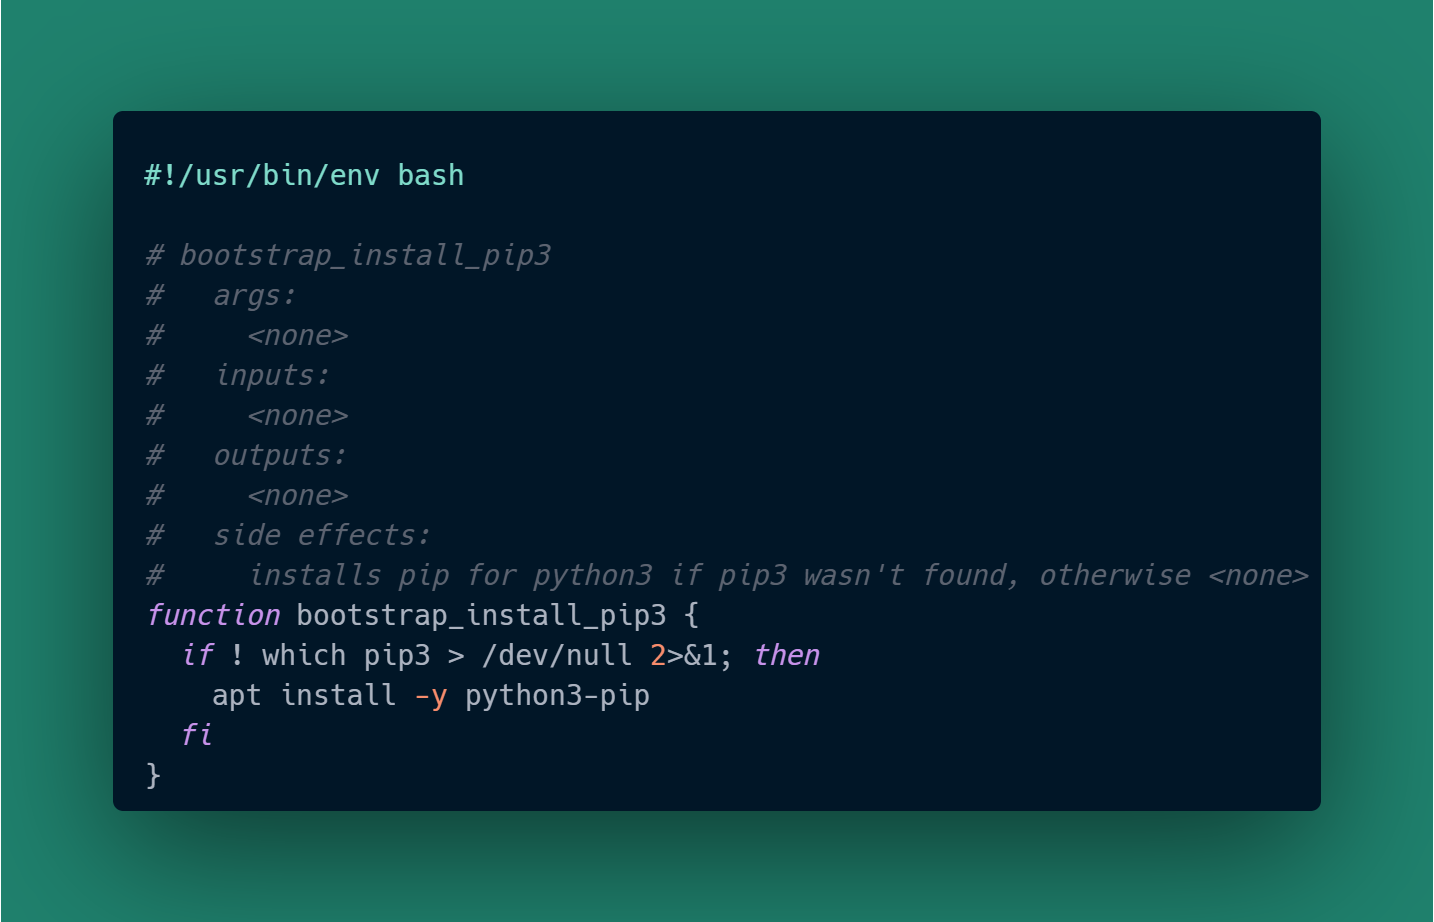
and to install pip for Python 3 (which isn’t automatically installed on Ubuntu 22.04):
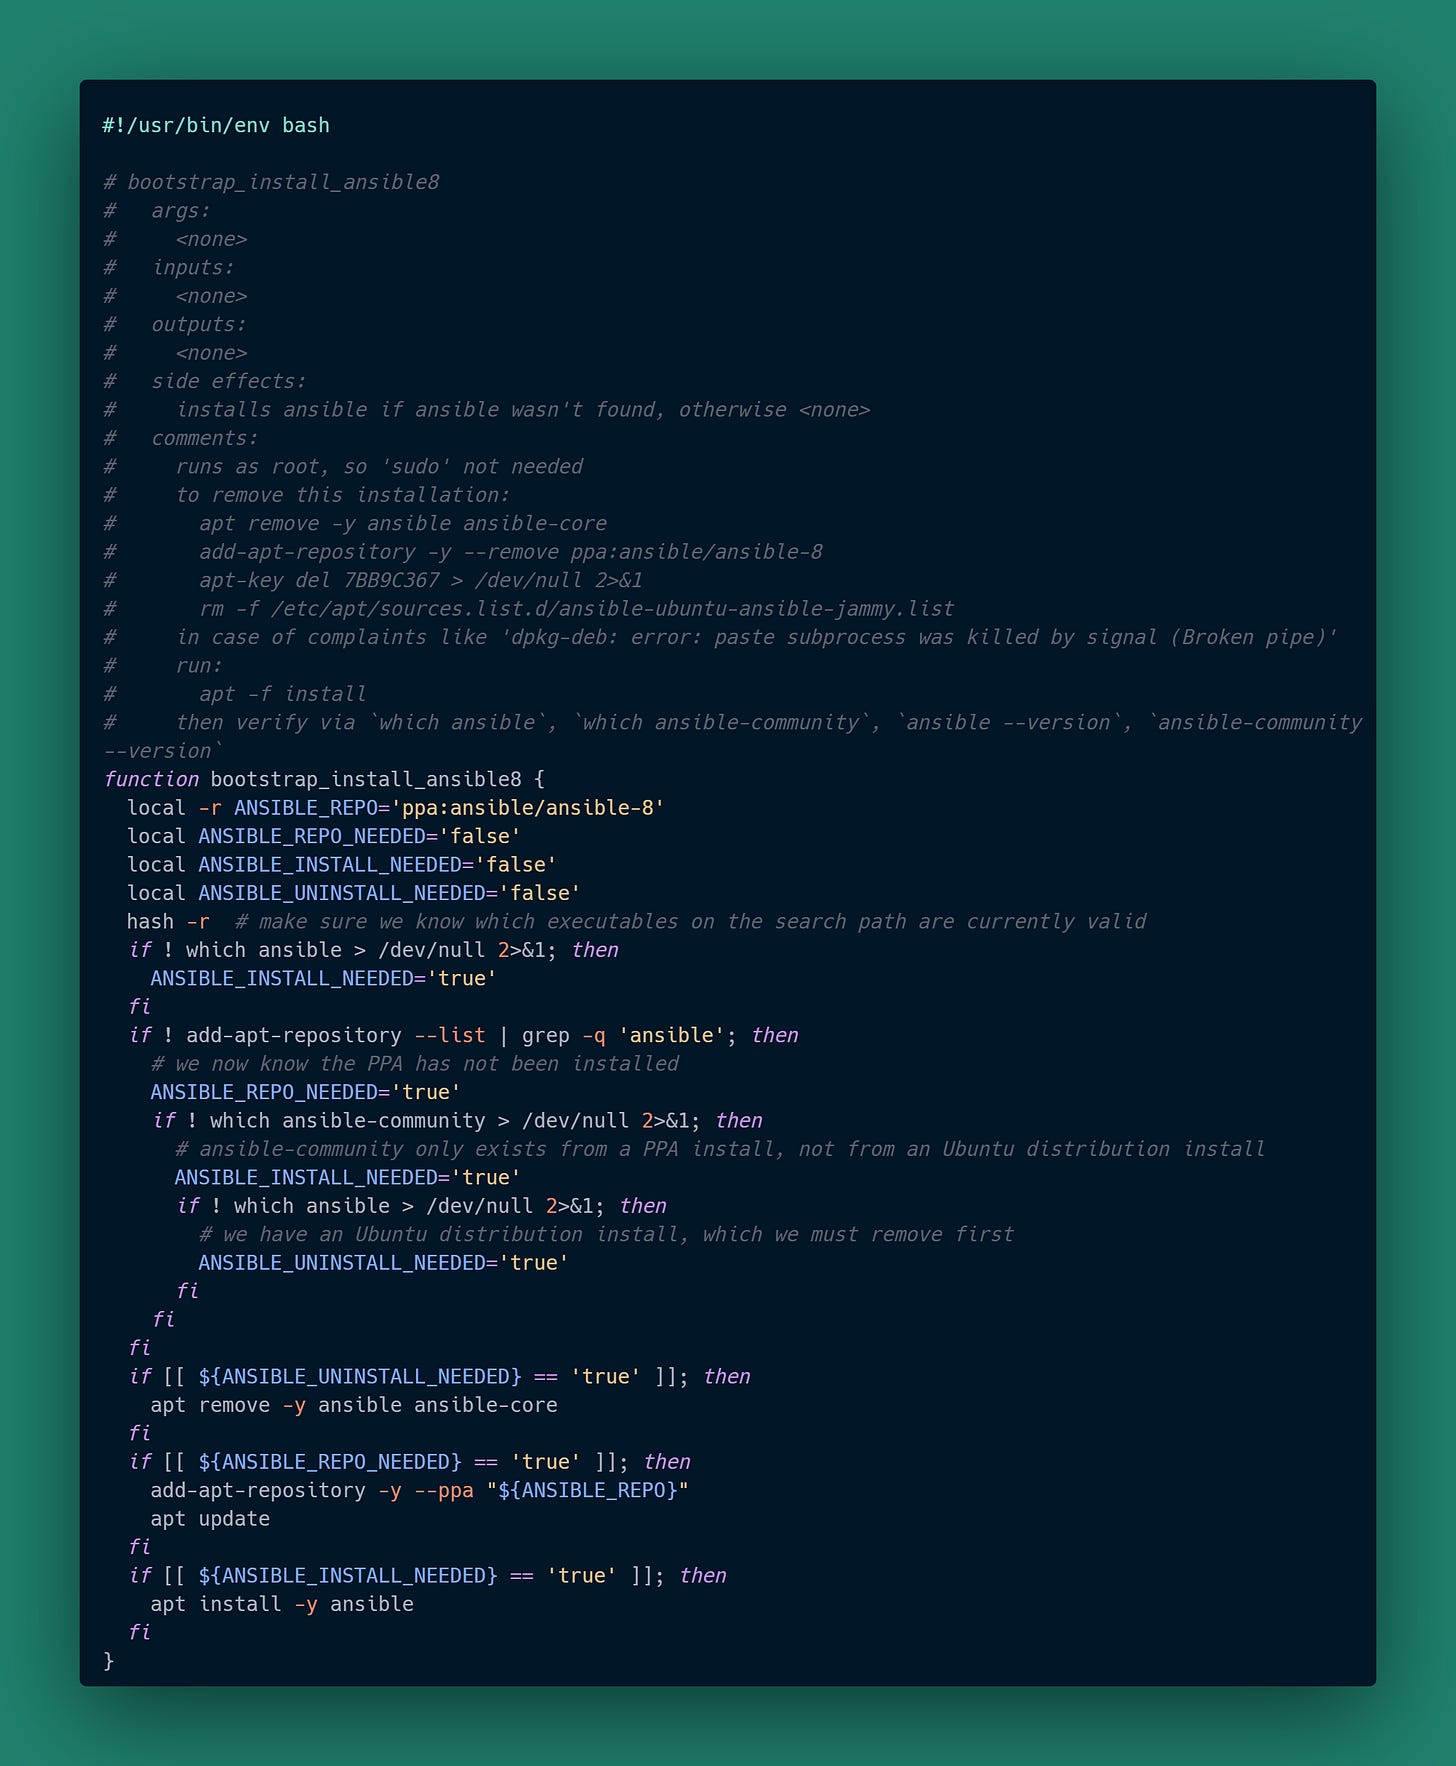
and to upgrade the Ansible installation (the default for Ubuntu 22.04 is ancient):
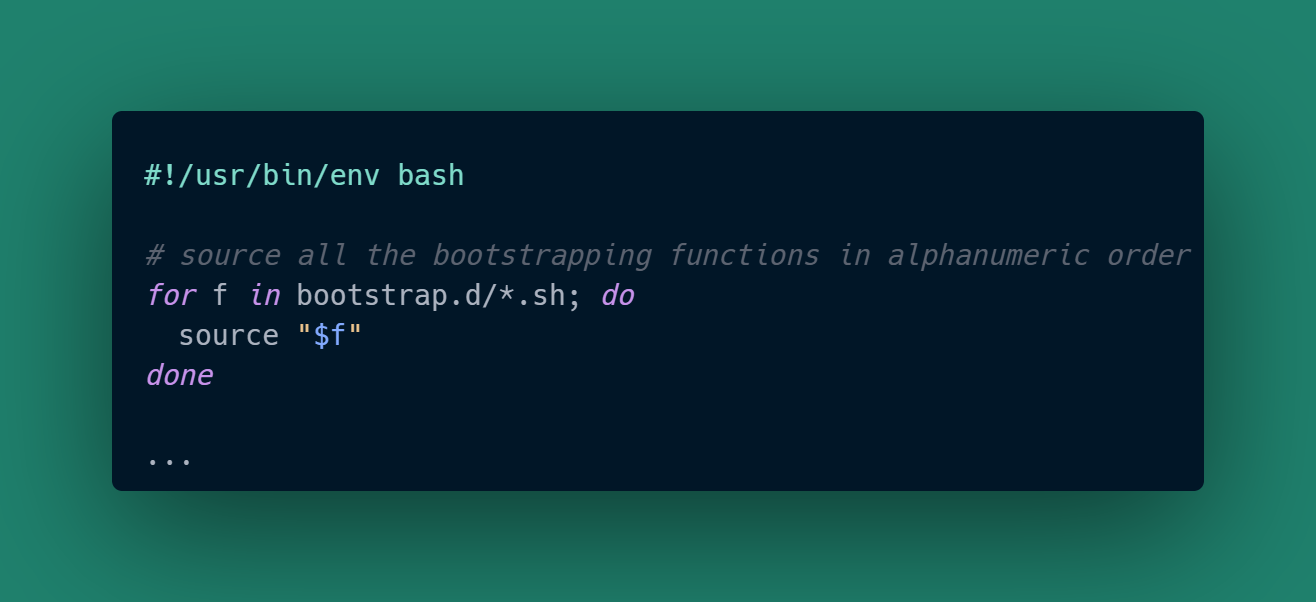
I like putting each feature function in a separate script, because then within a user or root bootstrapping script all I need is:
and then I can invoke the functions that make sense for either a non-root or a root user. The function files are just functions so they don’t take action until they are explicitly called.
The Experimentalist : Phase 1: Credentials Management and Bootstrapping © 2025 by Reid M. Pinchback is licensed under CC BY-SA 4.0


